Beautiful Lace Earrings DIY
posted in All on 11/13/2013
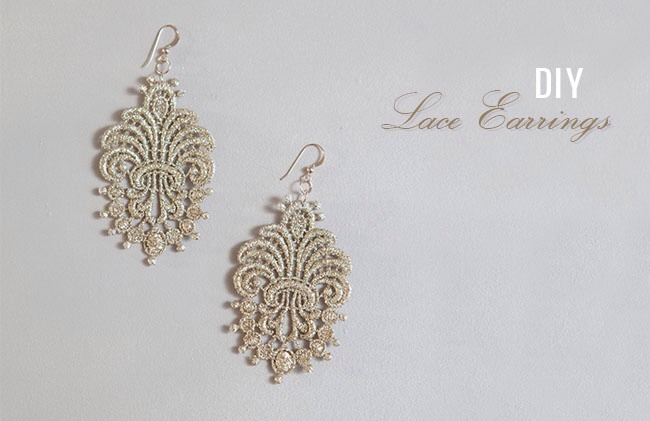
These incredibly lightweight stiffened lace applique earrings can be personalized to fit any wedding theme… and can be worn long after your special event!
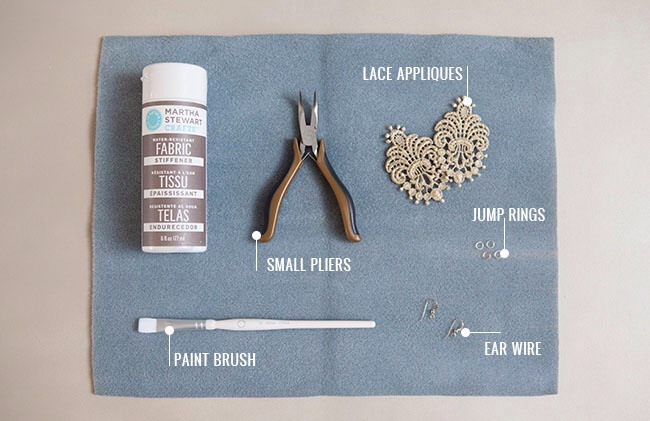
Materials
• Martha Stewart Fabric Stiffener
• 2 beautiful lace appliques (these were purchased from Mary, Not Martha)
• small paint brush
• small pliers
• 4 open jump rings (jump rings come in two forms, open and closed, meaning one can be opened and the other is a solid piece of metal)
•2 ear wire
• Martha Stewart Fabric Stiffener
• 2 beautiful lace appliques (these were purchased from Mary, Not Martha)
• small paint brush
• small pliers
• 4 open jump rings (jump rings come in two forms, open and closed, meaning one can be opened and the other is a solid piece of metal)
•2 ear wire
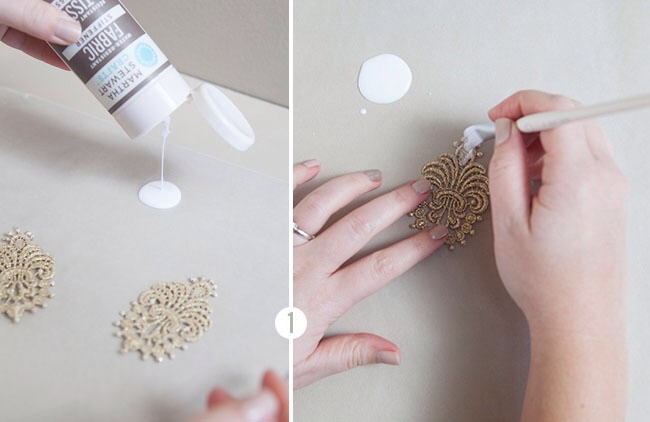
1.First, set up a workspace for yourself that is covered in wax paper.
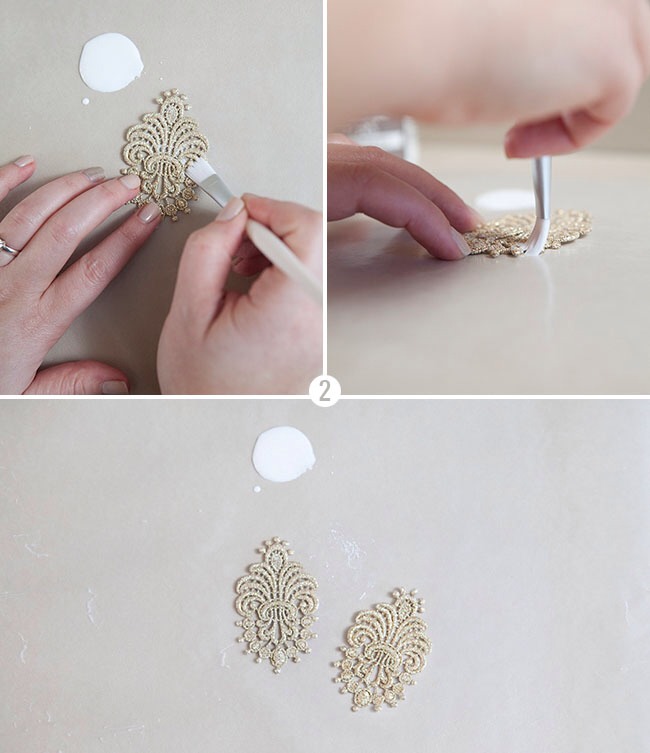
Now we will stiffen each lace applique, which is so easy! Thoroughly paint the front and back of each piece of lace with Crafts Fabric Stiffener and let dry completely on the wax paper – which usually takes an hour or so.
Sealing your beautiful lace with fabric stiffener ensures that while you are wearing these earrings the lace won’t become damaged, it will stay perfectly flat and won’t be stained by makeup.
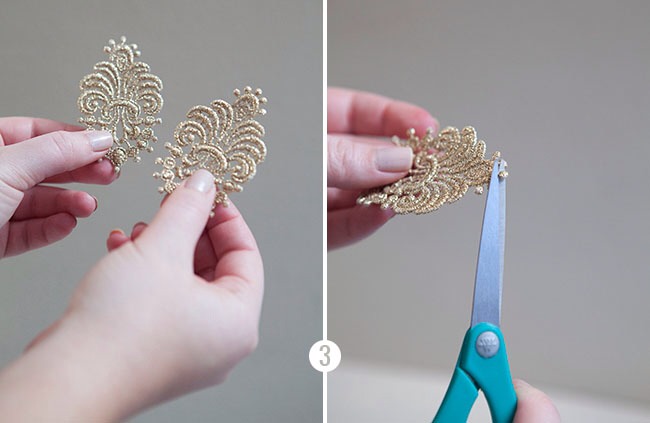
When turning the lace into earrings, some appliques might need a little snip here or there to better accomodate the space needed for the ear wire…
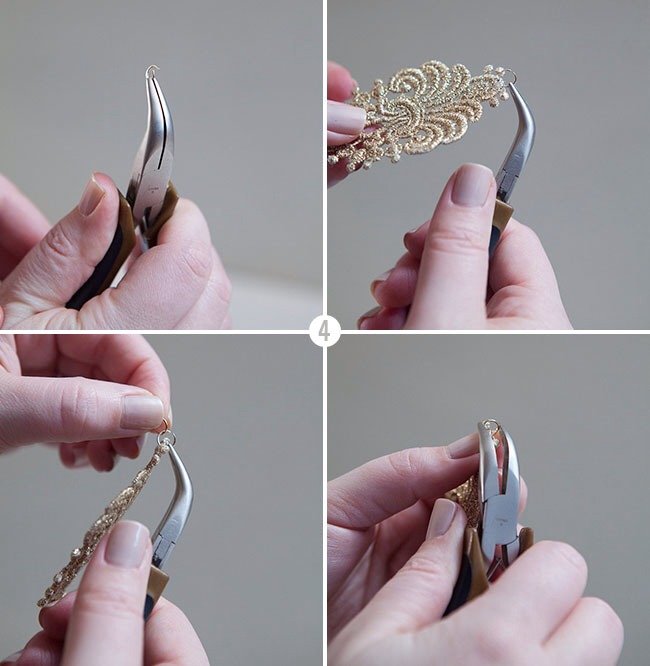
Using your pliers slightly bend one jump ring open and slip it through either the stitching of your applique or through an open space in the design and then pinch that jump ring closed. Add a second jump ring onto the first, which makes a bit of a chain and close that jump ring as well.
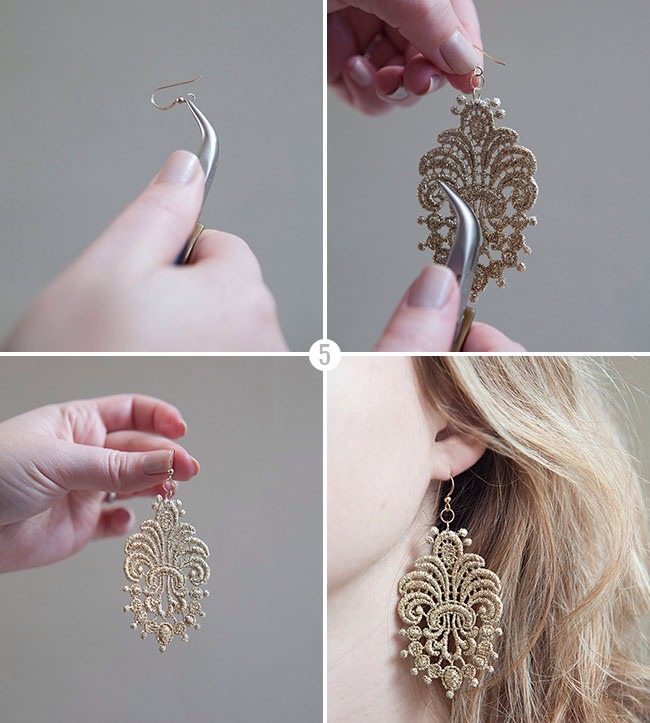
Next, slightly open the loop at the end of your ear wire and thread it onto the last jump ring, then carefully squeeze the ear wire closed. That’s it! That’s all it takes to make an earring!