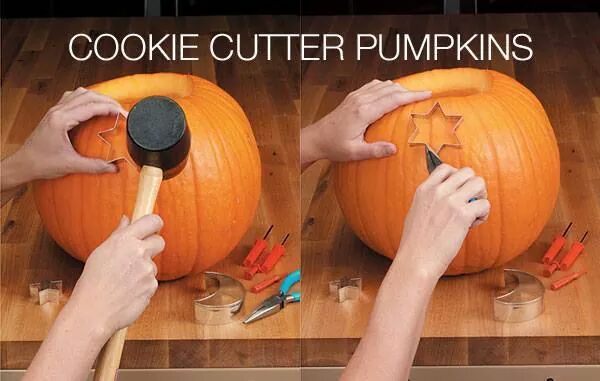
Cookie Cutter Pumpkins
posted in Other on 10/21/2014
Tools
1. Rubber mallet
2. Cookie cutters of various shapes and sizes
3. Pumpkin carving knife/paring knife (really gets the details)
4. Needle nose pliers
1. Cookie Cutter Time
Layout where you’d like your cutout shape to be and place your cookie cutter in that spot. Take your rubber mallet and give the cookie cutter a couple of good whacks. On a small pumpkin you could drive the cookie cutter all the way through but on a larger pumpkin
you’ll just need enough to make a good impression.
2. Carve It
Remove the cookie cutter from the pumpkin and if it’s in their too deep use your needle nose pliers. Take your knife and carve along the outline of where the cookie cutter made a dent in the pumpkin.
3. Clean It
Pop-out the piece of cut pumpkin and clean the inside of the pumpkin so there is nothing hanging in the way of the new hole.
4. Lights
Insert a tea light ( recommend the battery powered fake candles), and enjoy your perfectly carved pumpkin.