Step By Step Beauty!
posted in All on 6/11/2013
INSTA-GLAM RED LIP
The Before Look
The Before Look
INSTA-GLAM RED LIP
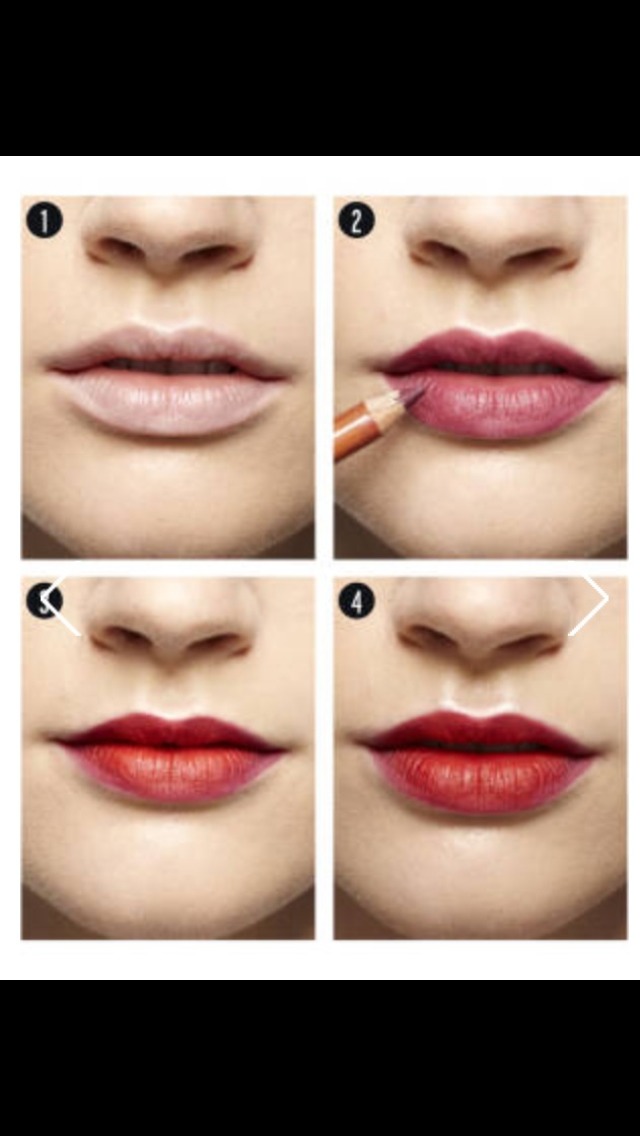
Step 1: Trace lips with a colorless liner (try Too Faced Borderline) to create a no-budge barrier.
Step 2: To add depth and make lips look fuller, fill in pout with a lipliner a touch darker than the lipstick hue.
Step 3: Apply lipstick. Blue-based reds complement fair complexions; orange-reds work well with darker tones.
Step 4: Dab highlighter over the cupid’s bow to accentuate the arch.
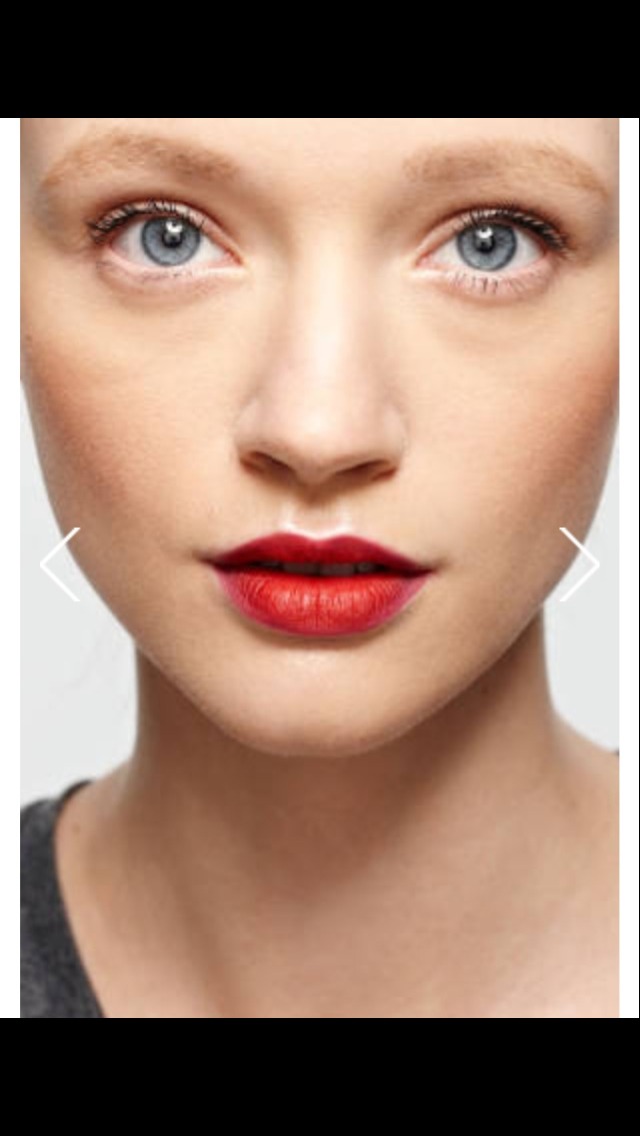
INSTA-GLAM RED LIP
The After Look
The After Look
QUICK
CONTOURING
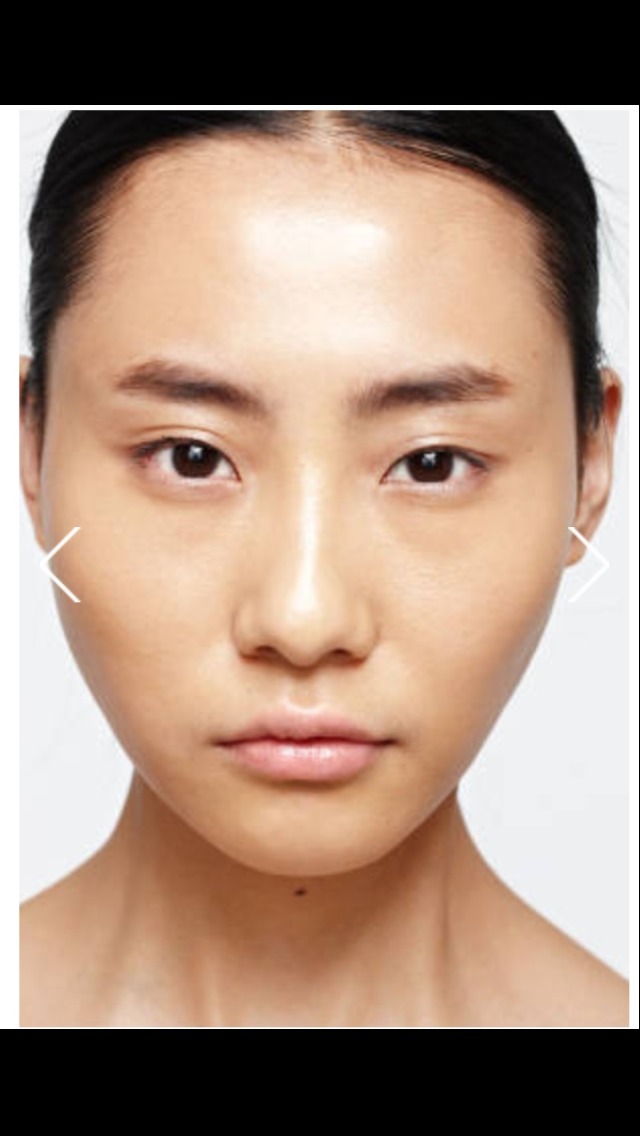
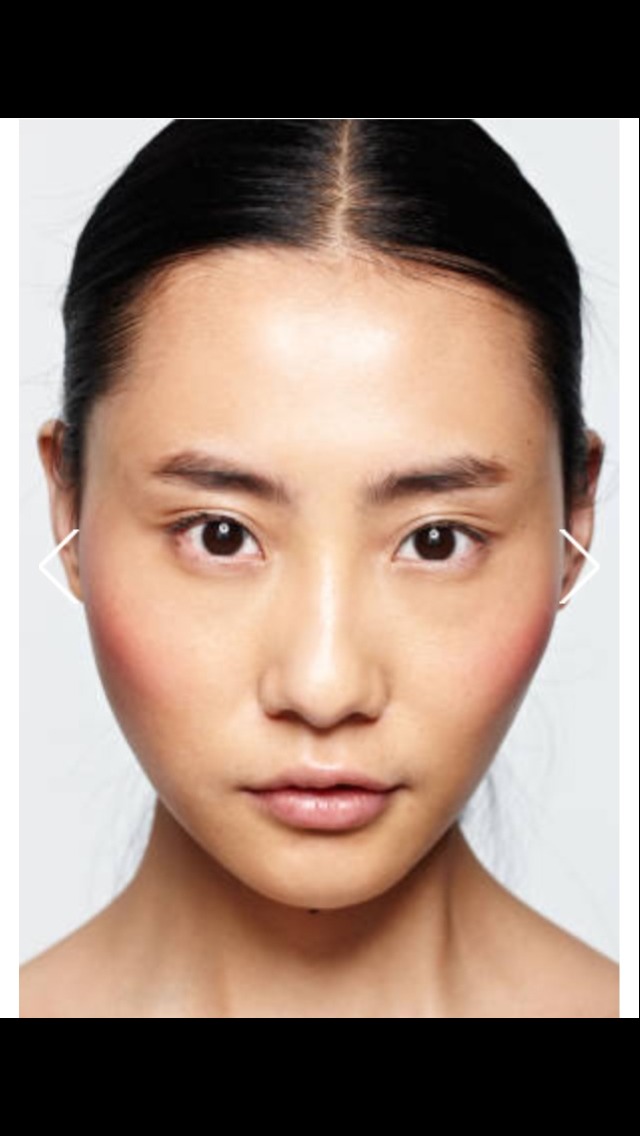
The Before Look
CONTOURING
The Before Look
QUICK
CONTOURING
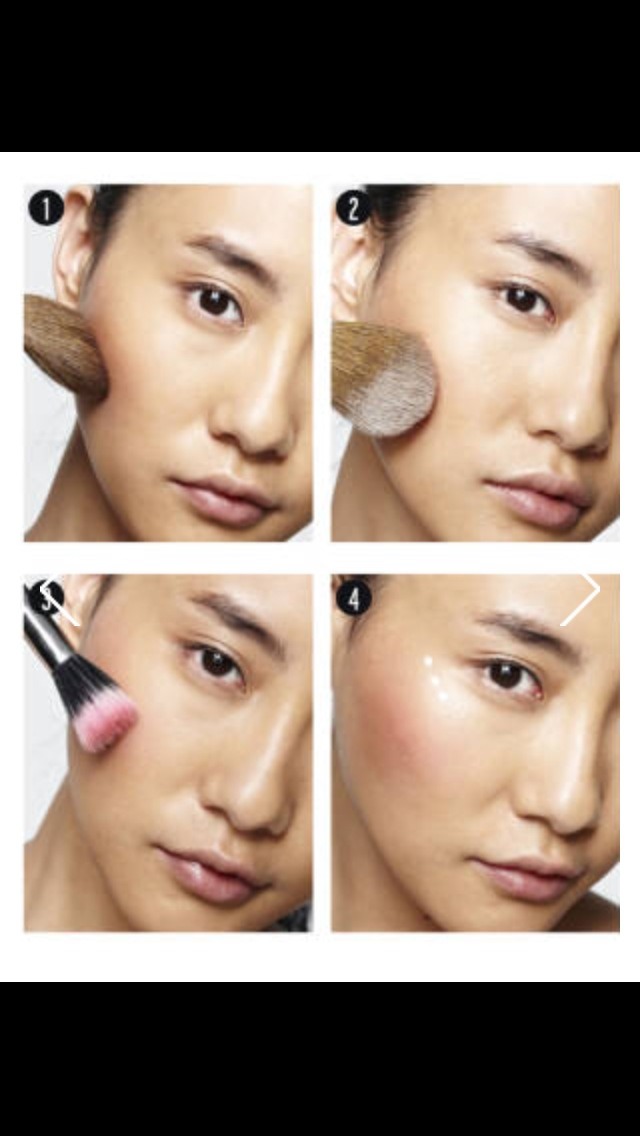
Step 1: Using the top edge of a large brush, apply powder bronzer (a shade darker than skin tone) below the cheekbone.
Step 2: Use the flat side of the same brush to sweep translucent powder over the bronzer to set.
Step 3: Buff a matte powder blush over the apple of the cheek and along the cheekbone.
Step 4: Dot highlighter, such as Benefit High Beam, along the upper cheekbone and blend for a dewy glow.
CONTOURING
Step 1: Using the top edge of a large brush, apply powder bronzer (a shade darker than skin tone) below the cheekbone.
Step 2: Use the flat side of the same brush to sweep translucent powder over the bronzer to set.
Step 3: Buff a matte powder blush over the apple of the cheek and along the cheekbone.
Step 4: Dot highlighter, such as Benefit High Beam, along the upper cheekbone and blend for a dewy glow.
QUICK
CONTOURING
The After Look
CONTOURING
The After Look
FIVE-MINUTE SMOKY EYE
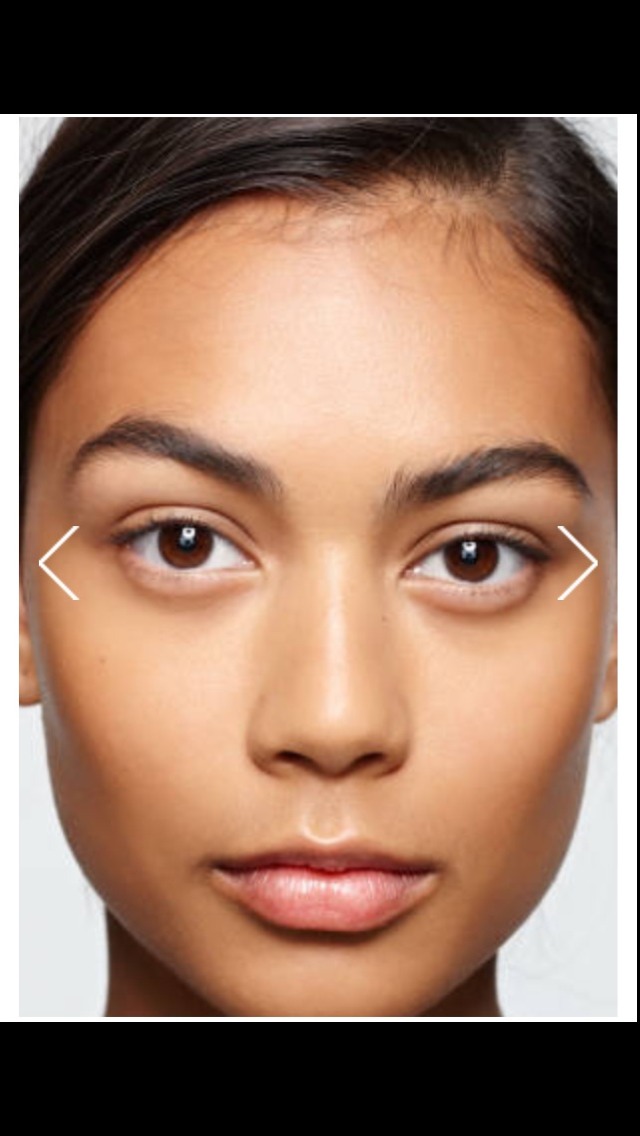
The Before Look
The Before Look
FIVE-MINUTE SMOKY EYE
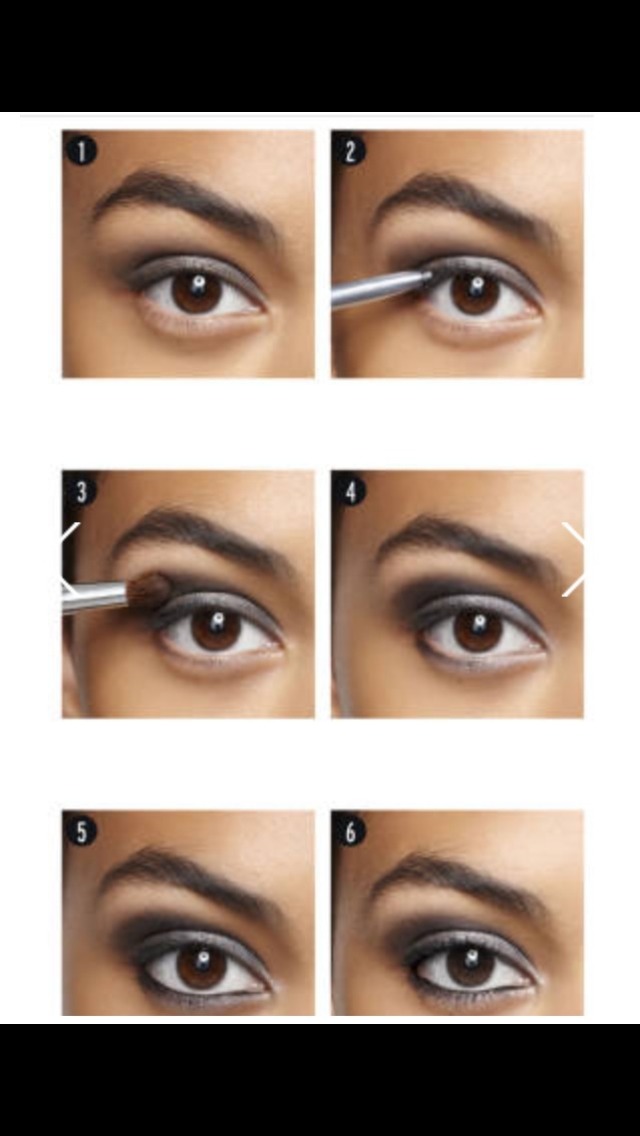
Step 1: Prime with a gray cream base (try Clinique Chubby Stick for Eyes in Curvaceous Coal).
Step 2: Draw a thin line of black eyeliner across the upper lash line.
Step 3: Layer a dark gray matte shadow over the cream base for dimension.
Step 4: Use a silver shadow shade to highlight the crease and inner eye.
Step 5: Line the lower lashes, then use a slanted liner brush to top the liner with silver shadow.
Step 6: Finish with generous coats of black mascara on both the upper and lower lashes.
FIVE-MINUTE SMOKY EYE
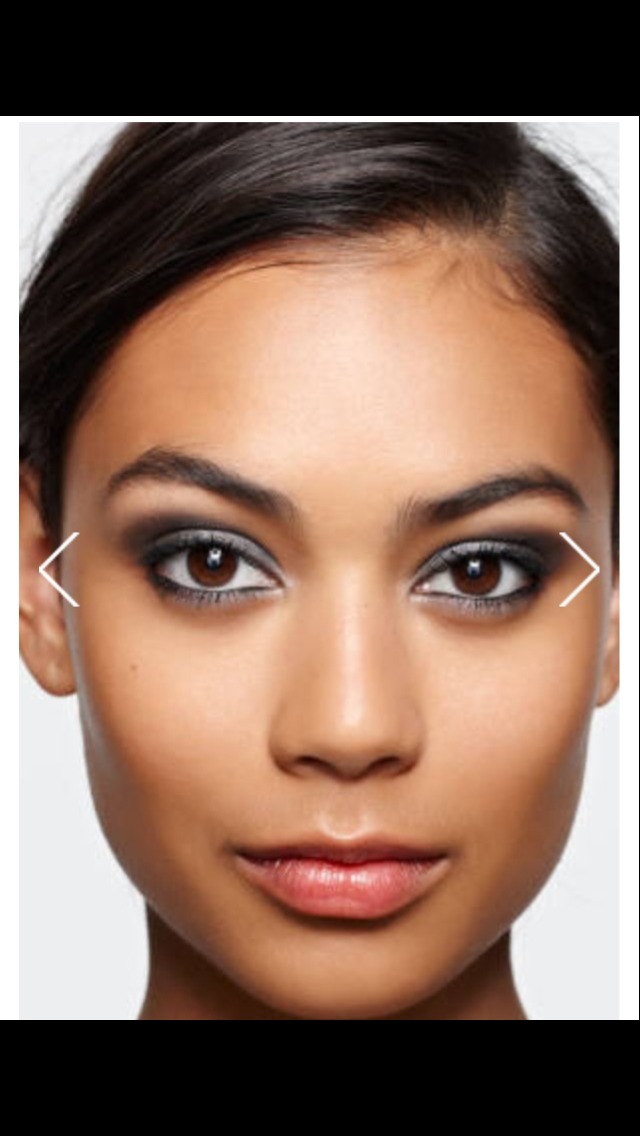
The After Look
The After Look
TWO-STEP
CAT EYE
The Before Look
CAT EYE
The Before Look
TWO-STEP
CAT EYE
Step 1: Extend gel liner from the inner corner along upper and lower lash lines, just past the outer edge, creating an eye-opening wing.
Step 2: Sweep a light-reflecting gilded shadow (such as Maybelline New York ExpertWear in Golden Halo) across the lid.
CAT EYE
Step 1: Extend gel liner from the inner corner along upper and lower lash lines, just past the outer edge, creating an eye-opening wing.
Step 2: Sweep a light-reflecting gilded shadow (such as Maybelline New York ExpertWear in Golden Halo) across the lid.
TWO-STEP
CAT EYE
The After Look
CAT EYE
The After Look
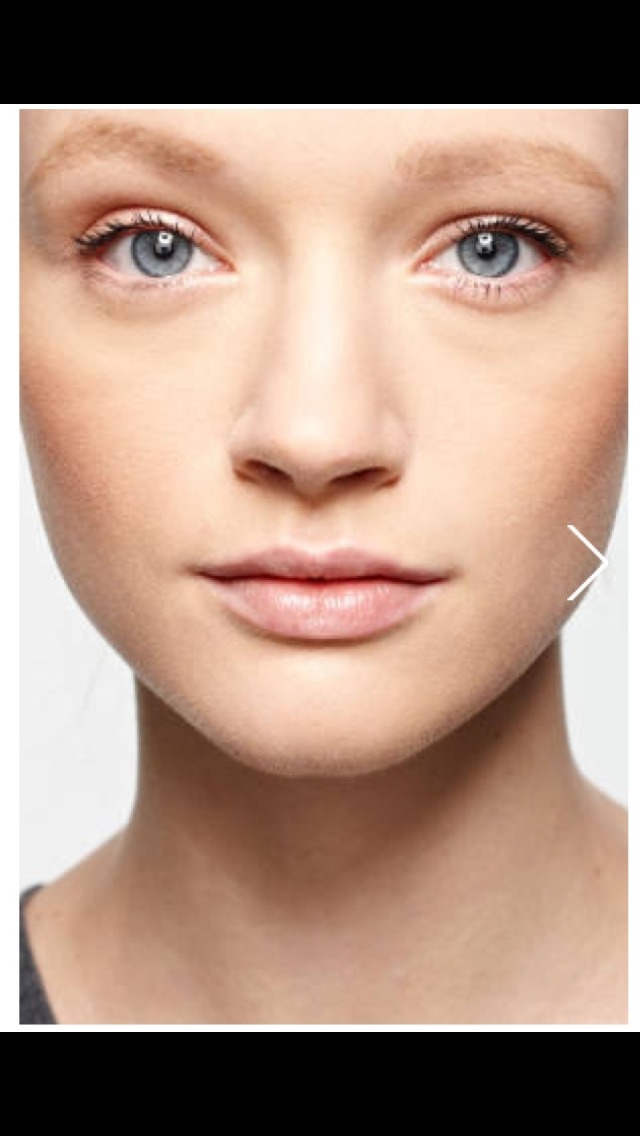
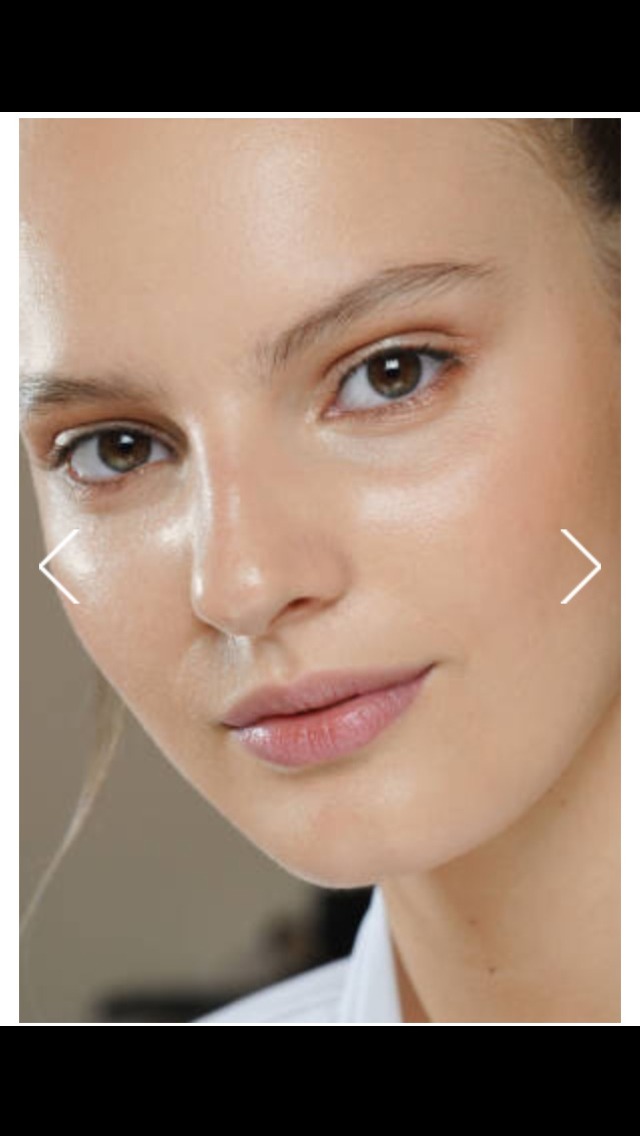
GLOWY SKIN: DAY
Discover how runway models get glowing skin for a fresh day look.
Discover how runway models get glowing skin for a fresh day look.
GLOWY SKIN: DAY
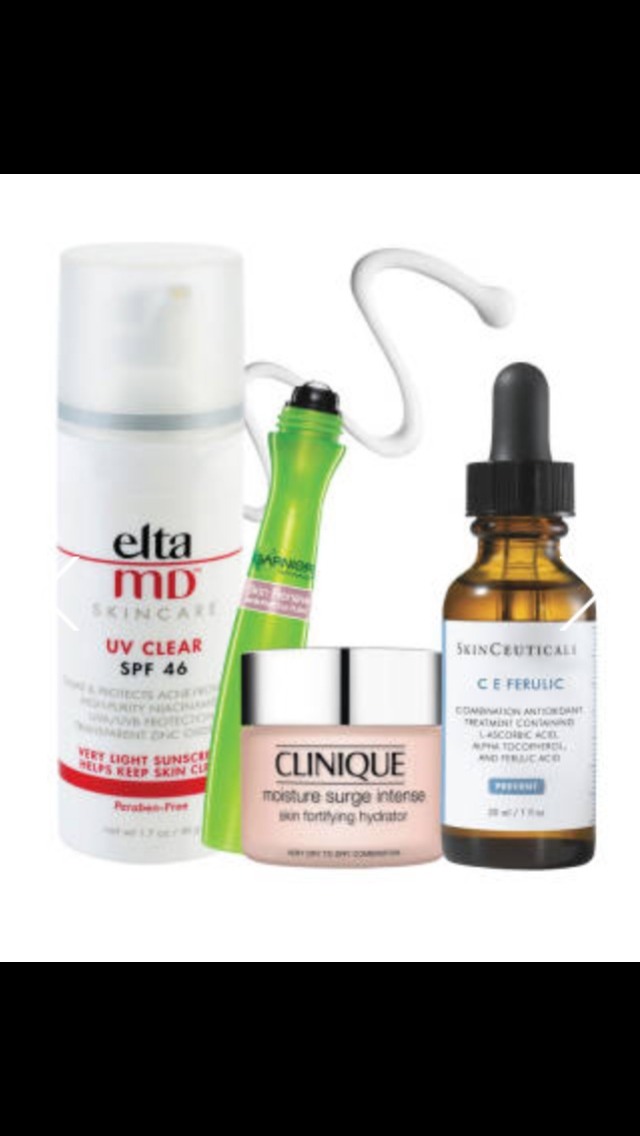
Step 1: As the first line of defense, apply an antioxidant serum to ward off free radical damage. Try Skinceuticals C E Ferulic
TIP: If necessary, target blemishes first with a sal-acid spot treatment.
Step 2: A roller-ball eye serum with caffeine will diminish dark circles and deflate puffiness by constricting blood vessels and stimulating micro-circulation. Try Garnier Skin Renew Anti-Puff Eye Roller
Step 3: Hydrate with moisturizer to reinforce the skin’s protective barrier and create a smooth, even base for makeup. Try Clinique Moisture Surge Intense Skin Fortifying Hydrator Facial Treatment
TIP: If you have combination skin, skip the T-zone area.
Step 4: Rain or shine, fend off rays with a minimum SPF 30 sunscreen. Try Eltamd UV Clear SPF 46
TIP: If you use a retinoid, which makes skin prone to burning, SPF is extra crucial.
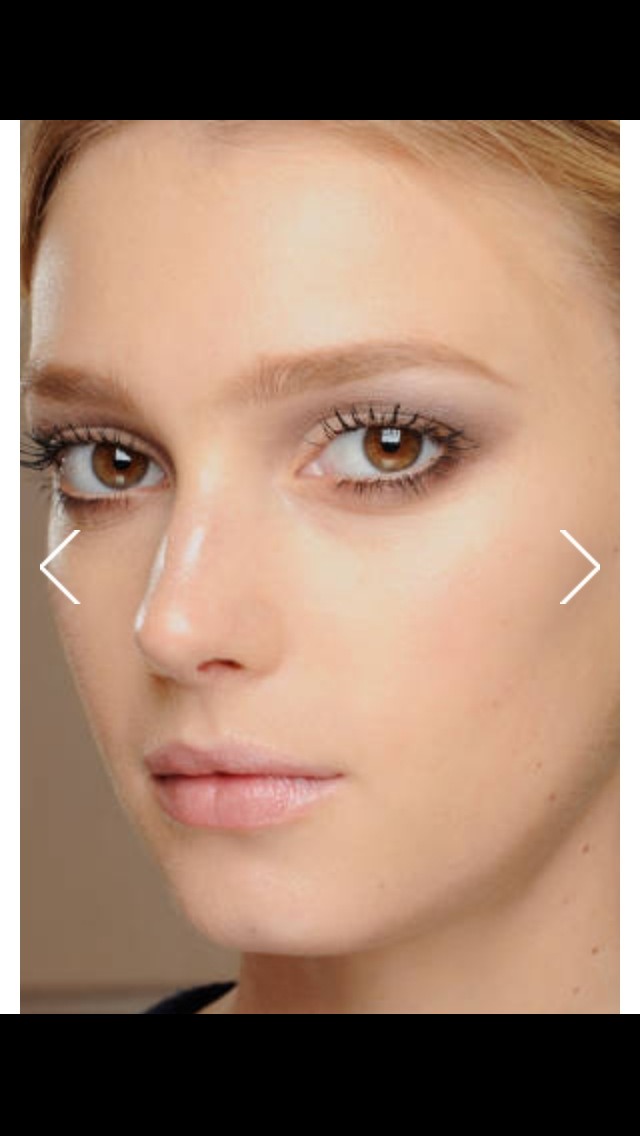
GLOWY SKIN: NIGHT
Take your glowy skin from day to night with these easy to use products.
Take your glowy skin from day to night with these easy to use products.
GLOWY SKIN: NIGHT
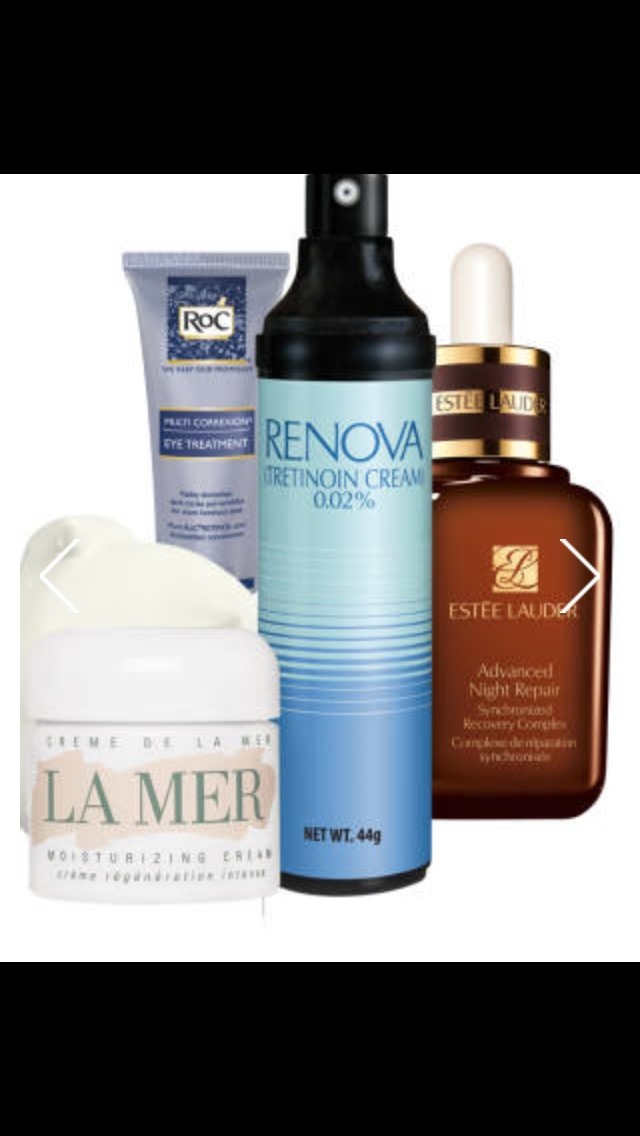
Step 1: Not using a retinoid? Get to a derm, stat. Nothing beats its anti-aging effects, and newer formulas, like Renova (shown), are formulated for sensitive skin.
Not ready for an Rx? Try a potent serum to speed up cell turnover. Try Estée Lauder 'Advanced Night Repair' Synchronized Recovery Complex
TIP: Layer topicals from lightest (serums) to heaviest (creams).
Step 2: To avoid irritation, keep potent serums away from the eyes. Treat the area with a vitamin A-and-C- packed eye cream to soften lines and fade brown spots. Try RoC Multi-Correxion Eye Treatment
Step 3: Top with a hydrating moisturizer. Try La Mer Moisturizing Cream
TIP: New to retinoids? For the first few weeks, apply first instead of last as a buffer.
FAUX LASHES
Velvety, come-hither lashes are more accessible than ever with these easy steps.
Velvety, come-hither lashes are more accessible than ever with these easy steps.
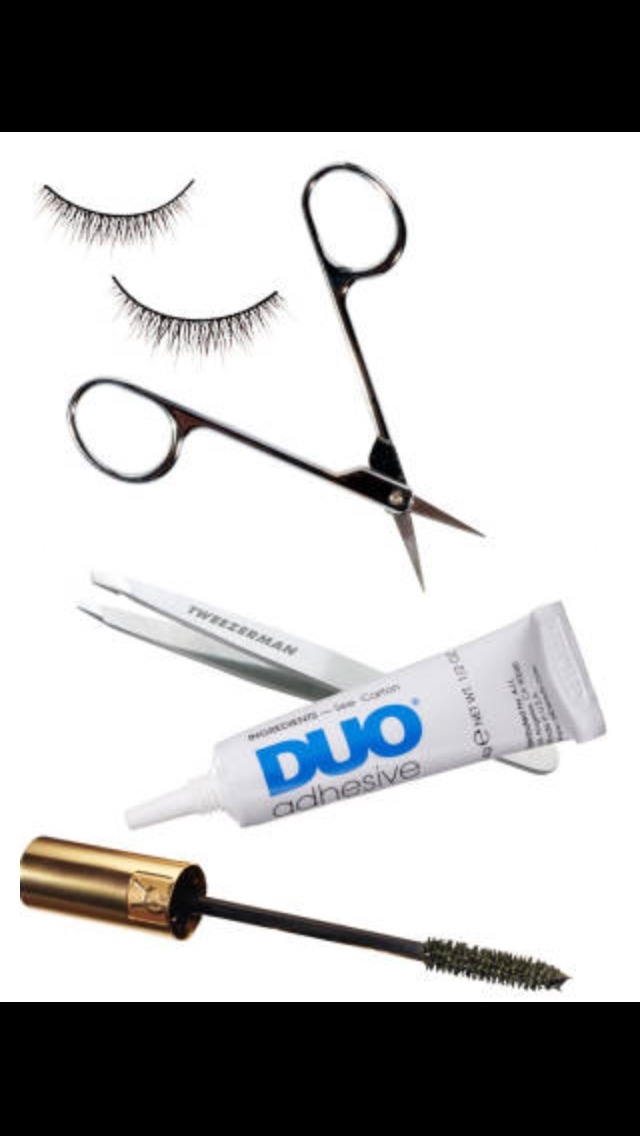
FAUX LASHES
Step 1: Trim each end of the lash strip as needed for a proper fit.
Step 2: Use a tiny brush to paint glue onto strip edge; let set for a few seconds to become tacky and prevent sliding on lid. Try MAC DUO Adhesive for Falselashes
Step 3: Grasp the center of the falsies with tweezers and press the strip into the base of your natural lash line. Try Tweezerman Stainless Steel Slant Tweezers
Step 4: Let glue dry for a minute, then finish with coats of mascara to blend real and false lashes.
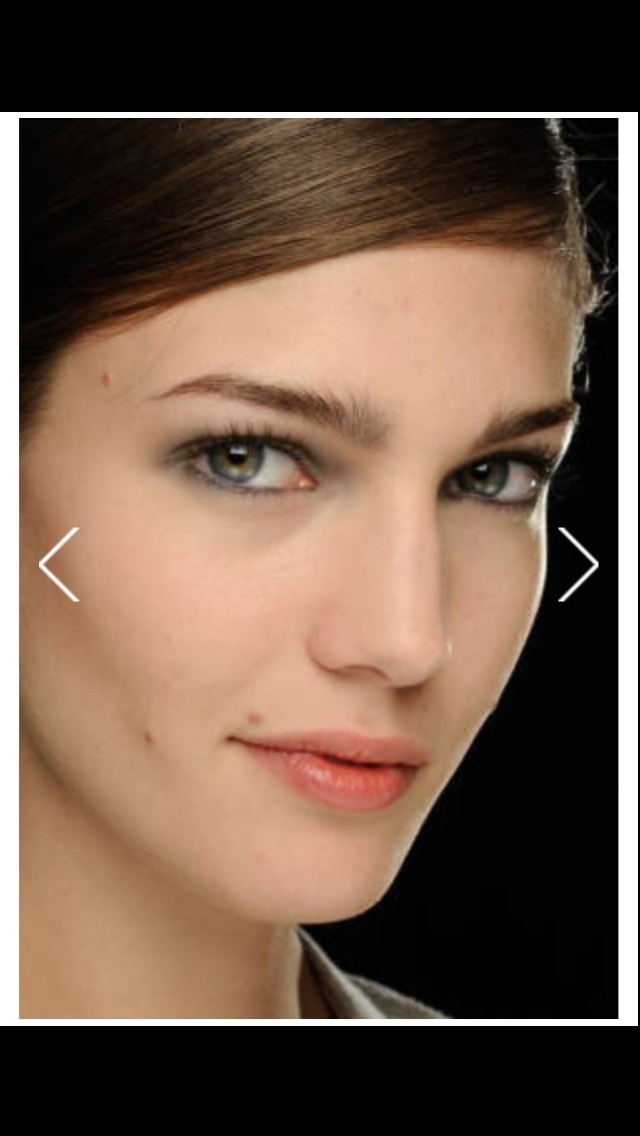
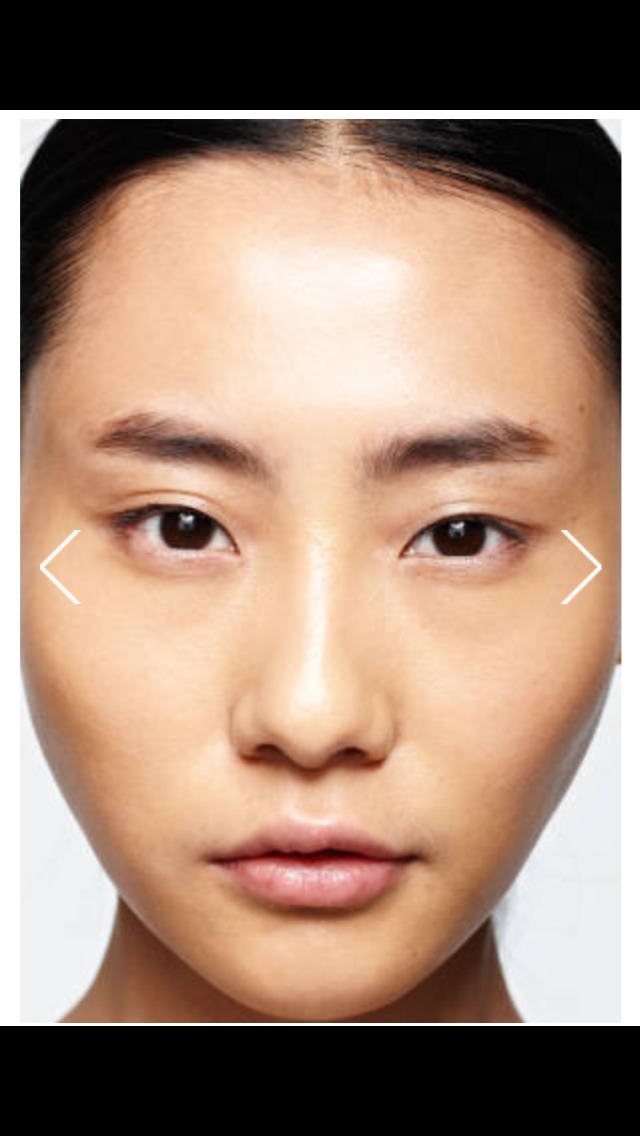
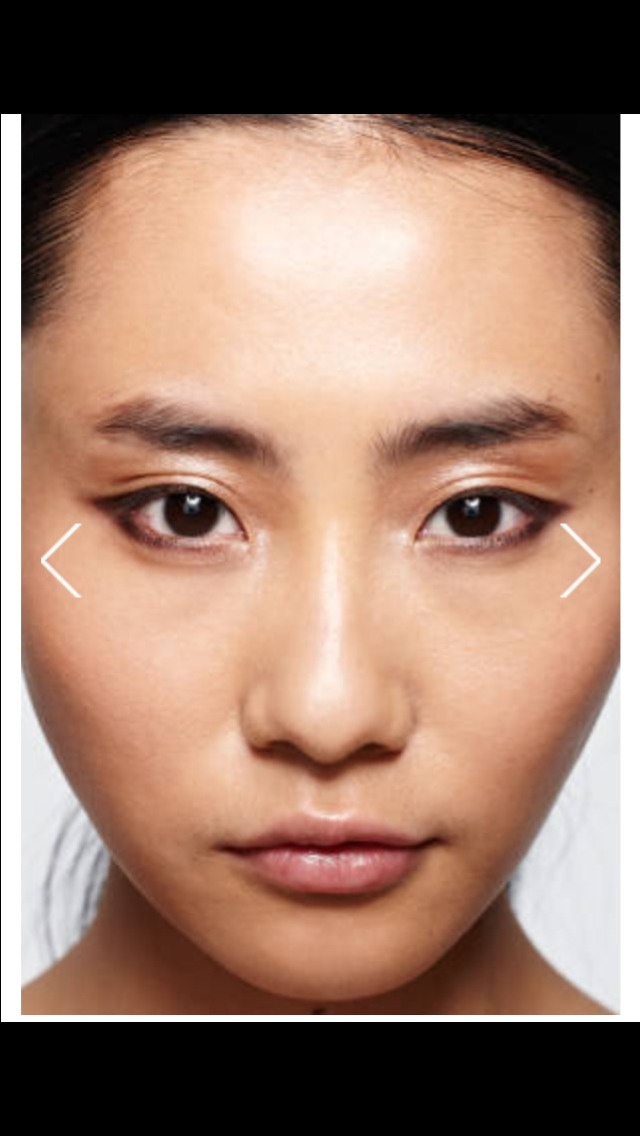
PERFECT ARCHES
For perfect arches, check out these brow shaping tips.
For perfect arches, check out these brow shaping tips.

PERFECT ARCHES
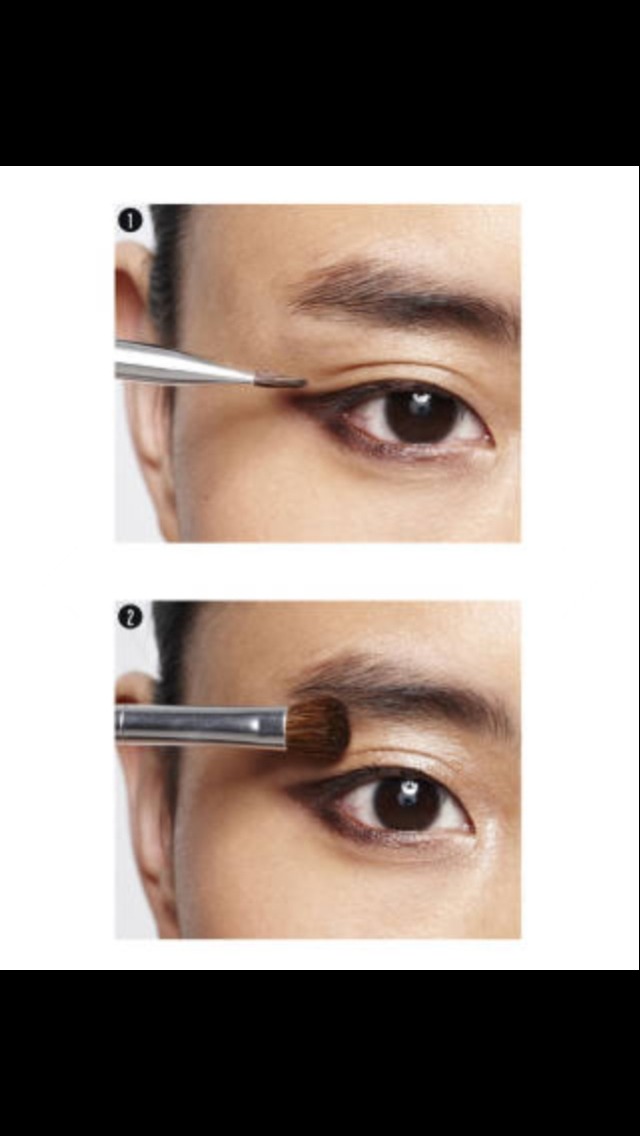
Step 1: Tweeze stray hairs in the direction they grow, being careful to not overpluck. (Save shape overhauls for the pros.) Try Tweezerman Stainless Steel Slant Tweezers
Step 2: Create the appearance of full brows by using a soft pencil to fill in sparse areas. Try Lancôme's Le Crayon Poudre
Step 3: Brush on clear brow gel to set the look.
Step 4: Trace under the brow with a highlighter to define the arch.