Step-By-Step Winged Eyeliner Tutorial + Bonus Tips And Tricks!
posted in Makeup on 10/26/2014
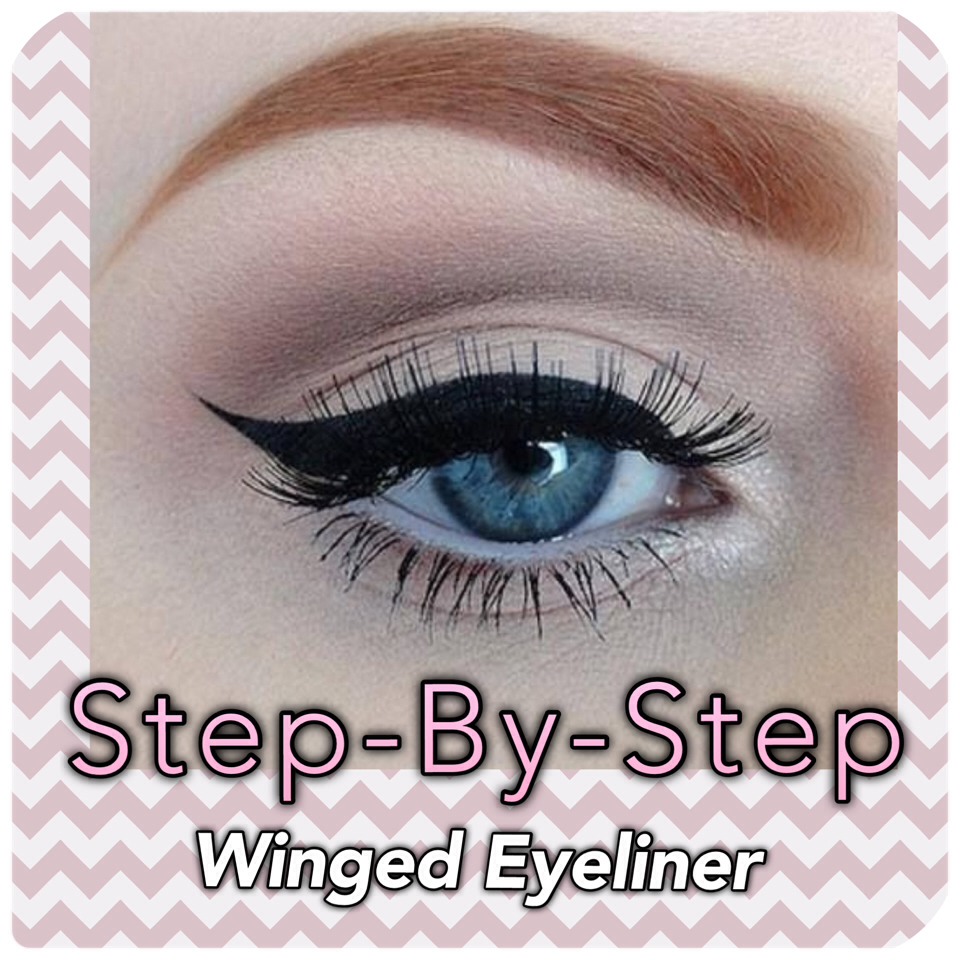
Get it perfect every time!
There’s something about a simple winged eyeliner look that looks good on everyone. The extra flick of liner has been done since the ’50s and still adds that perfect dose of glamour needed to spruce any eye look up. It's surprisingly easy to create, and you could use any eyeliner formula—from liquids, gels, and creams. LA-based makeup artist Jason Sanchez suggests using an angled brush and gel formula because, “the combination of products give you a lot of control and fluidity.” Sanchez breaks down each step for us, so grab your tools and follow along!
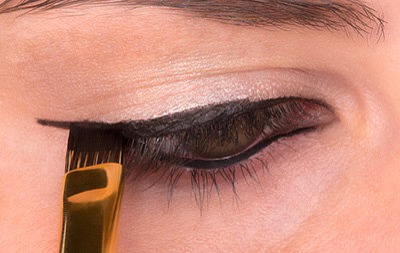
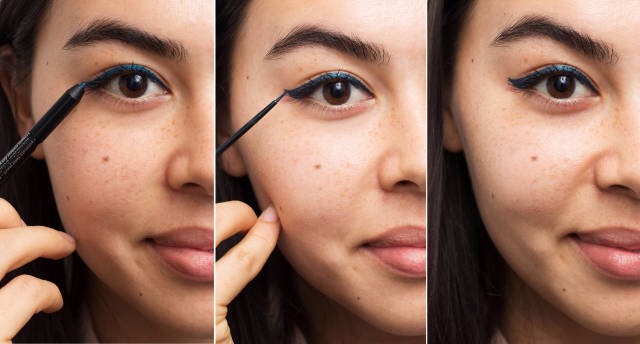
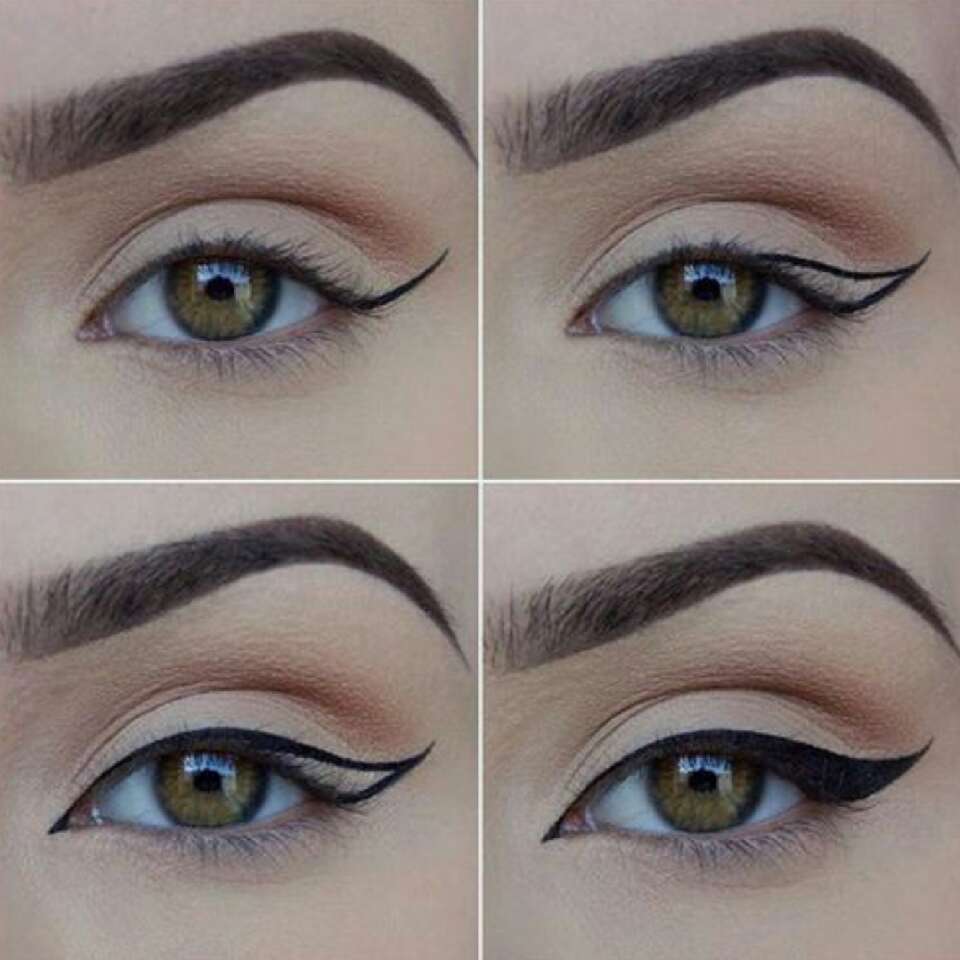
STEP 1
Dip your brush in eyeliner and gently drag it along the lash line and past the top outer corner of your eye. You want the brush to follow the upward curve of your eye. For a more dramatic winged look, draw farther out and angle the liner slightly more.
Dip your brush in eyeliner and gently drag it along the lash line and past the top outer corner of your eye. You want the brush to follow the upward curve of your eye. For a more dramatic winged look, draw farther out and angle the liner slightly more.
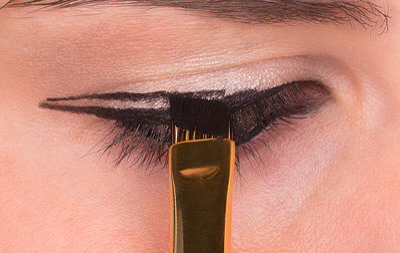
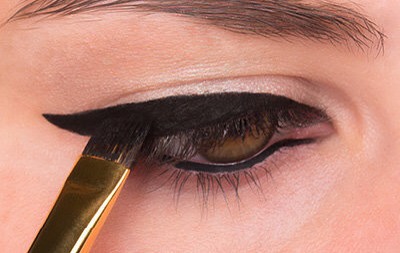
STEP 2
Next, you want to create the winged effect. Place the brush at the outer corner of the line you just drew and work back toward the center of your eye, filling it in using light strokes.
Next, you want to create the winged effect. Place the brush at the outer corner of the line you just drew and work back toward the center of your eye, filling it in using light strokes.
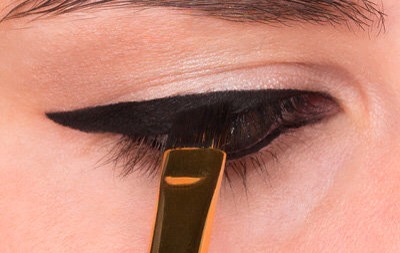
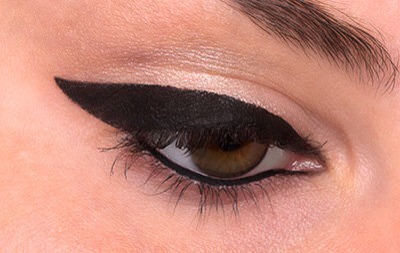
STEP 3
As you get closer to the inner lash line, paint a thinner line. You want the effect of the liner to be thin to thick from the inner corner of the eye to the outer.
As you get closer to the inner lash line, paint a thinner line. You want the effect of the liner to be thin to thick from the inner corner of the eye to the outer.
STEP 4
Connect the liner to the inner corner of your eye and fill in any missing spaces along the lash line.
Connect the liner to the inner corner of your eye and fill in any missing spaces along the lash line.
STEP 5
Repeat steps 2 to 5 on your other eye and voilà, you've completed your winged eyeliner!
Repeat steps 2 to 5 on your other eye and voilà, you've completed your winged eyeliner!
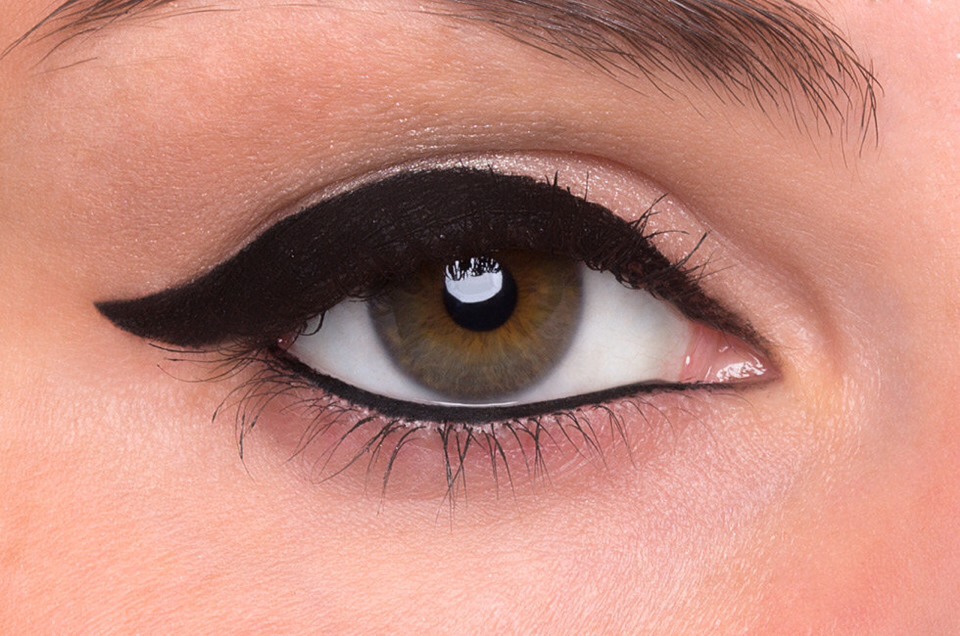
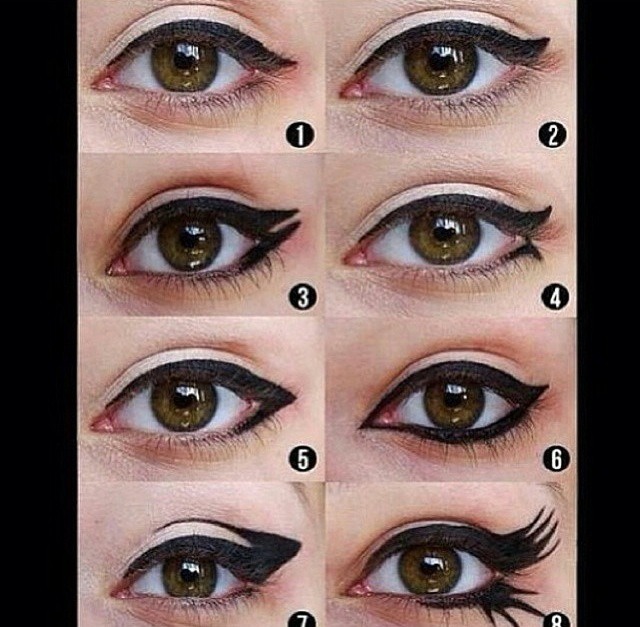
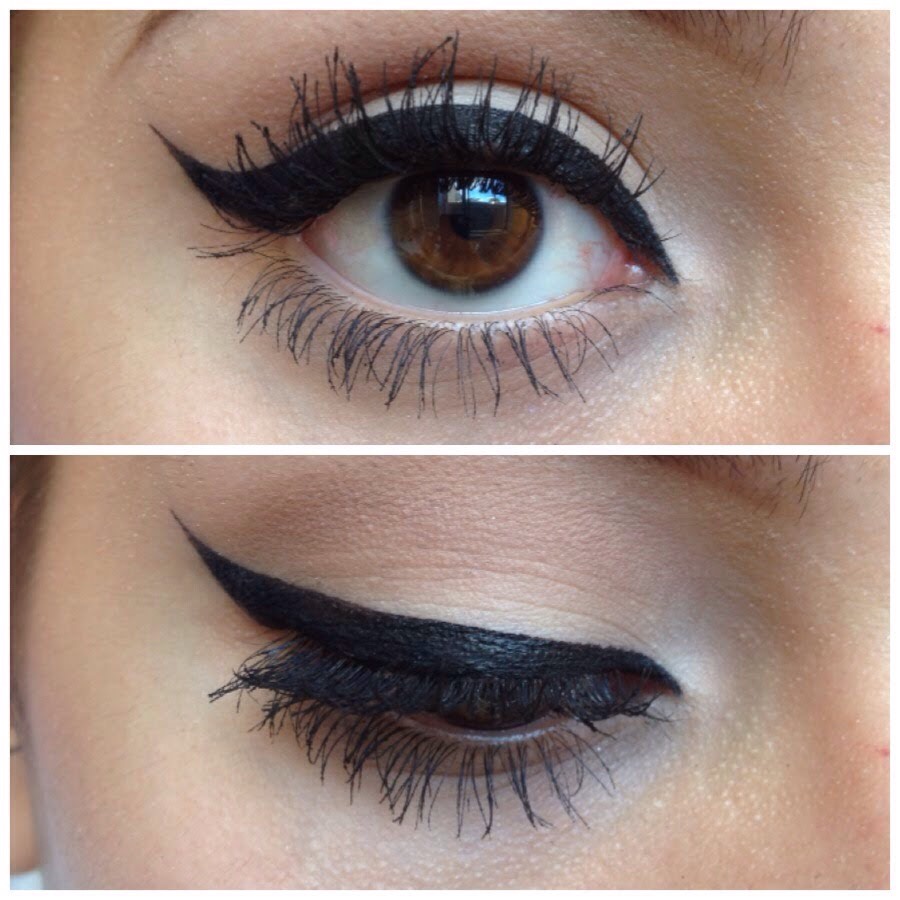
Finished result! (Optional line the bottom of your eye for a more statement look).
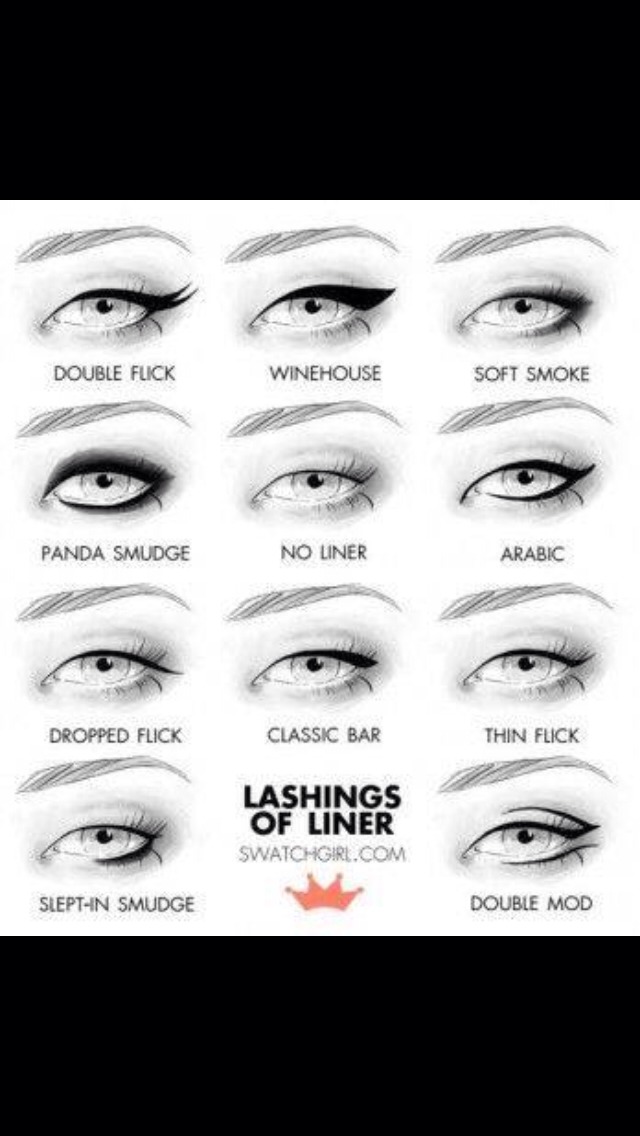
Bonus Tips & Tricks:
Eyeliner is not only a way to play with color and make a statement; it's also the perfect instrument to reshape your eye. You don't have to go under the knife for bigger-looking eyes if you know how to wield an eyeliner brush for your eye shape.
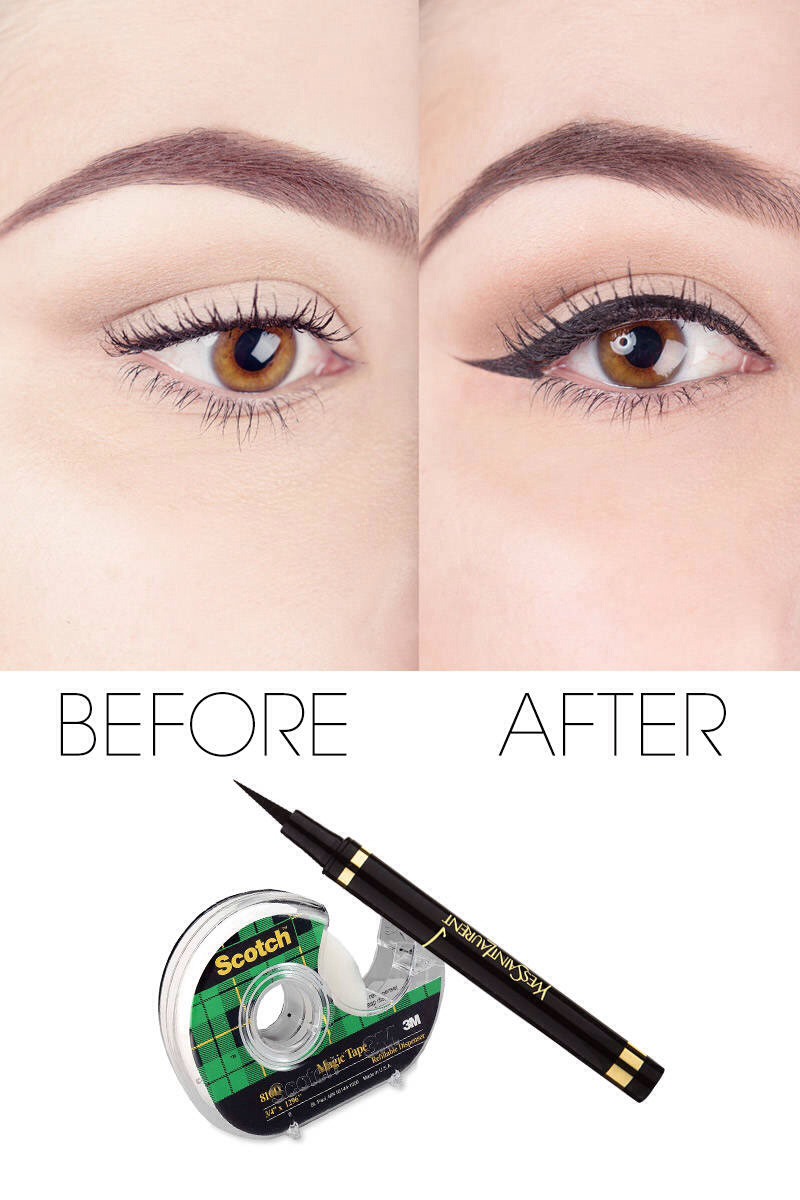
Here's another quick tip: are you bad at applying winged eyeliner, or generally just have an unsteady hand? If so, look no further! If you're anything like me, I struggle with creating even flicks on both eyes, so this is definitely a total life-saver! All you need is scotch tape!
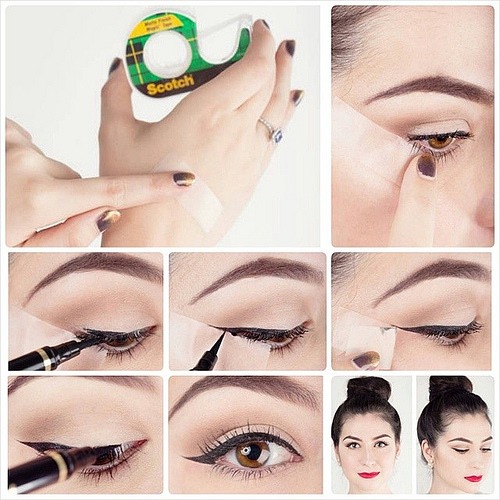
Use a pencil liner as a guide for tricky liquid liners.
If your hand isn't steady enough for liquid eyeliner, line your eyes first with a pencil liner, and then trace over it with liquid.
If your hand isn't steady enough for liquid eyeliner, line your eyes first with a pencil liner, and then trace over it with liquid.

More tips like this
Makeup
Eyeliner Styles & Tutorials
1.2K4
Makeup
10 Different Eyeliner Tutorials
4.1K11
Makeup
Easy Eyeliner Tutorial 😎
5992
Makeup
Stunning Eyeliner Tutorial 😍
3028
Makeup
Eyeliner Tips
4652
Makeup
~ GET IT PERFECT EVERY TIME ~ Amazing Eyeliner Tips 'n' Tricks!
8927
Makeup
Eyeliner Tips And Tricks
3042
Makeup
💖 10 Eyeliner Tutorials 💖
357